Laser247 New User Guide: Step‑by‑Step Setup, Login, and Signup Explained
Introduction to Laser247
Laser247 has emerged as a leading platform for on‑demand laser cutting, engraving, and prototyping services across India. Whether you are an industrial designer, a small‑business owner, or a hobbyist, the portal offers a streamlined workflow that turns digital designs into high‑precision physical parts. For newcomers, navigating the platform can seem daunting, but this guide demystifies the entire process—from discovering the service to completing your first order. By the end of this article, you will be comfortable creating an account, verifying your credentials, logging in securely, and leveraging the dashboard to manage projects efficiently.
Creating Your First Account
Why Sign Up?
Registering on Laser247 opens up access to a suite of tools designed to simplify the manufacturing workflow. An account stores your design files, order history, and payment preferences, allowing you to place repeat orders with a single click. Additionally, registered users receive priority support, exclusive promotions, and updates on new material options.
Step‑by‑Step Registration Process
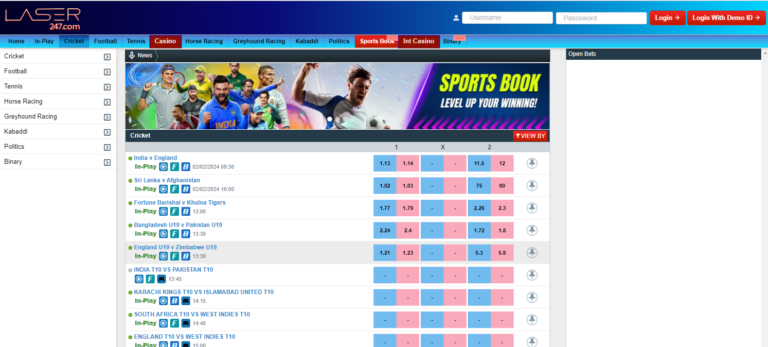
Begin by navigating to the official website. On the homepage, locate the prominent laser247 online signup button. Click it to access the registration form, which requires essential information such as your full name, email address, mobile number, and a secure password. Choose a password that combines uppercase letters, numbers, and special characters to enhance security. After filling out the form, you will be asked to accept the terms of service and privacy policy—ensure you read them carefully before consenting.
Once submitted, an automated verification email will be sent to the address you provided. Open the email and click the verification link within 24 hours; otherwise, the account creation process will be halted. After verification, you can log in for the first time and start exploring the platform’s features.
Secure Access: Logging In
Understanding the Login Interface
Laser247 values user security, employing encryption protocols to protect personal data. To access your dashboard, head back to the homepage and click the laser247 online login button. You will be presented with fields for your registered email and password. If you have enabled two‑factor authentication (which is highly recommended), you will also receive a one‑time code via SMS or an authenticator app.
Best Practices for Password Management
Never reuse passwords across multiple platforms. Consider using a reputable password manager to generate and store complex passwords. Enable the “Remember Me” option only on trusted personal devices; on public or shared computers, always log out after each session. If you suspect any unauthorized activity, use the “Forgot Password” link to reset your credentials immediately.
Exploring the User Dashboard
Key Sections Overview
After a successful login, you are greeted by a clean, intuitive dashboard. The main navigation bar typically includes the following sections:
- My Projects: A repository of all uploaded design files, both pending and completed.
- Order History: Detailed records of past orders, including material, dimensions, and status.
- Quotes & Pricing: Real‑time cost calculators based on material, thickness, and laser parameters.
- Billing & Payments: Management of saved payment methods, invoices, and transaction logs.
- Support: Access to FAQs, live chat, and ticket submission for technical assistance.
Customizing Your Profile
Click on the profile icon in the top‑right corner to edit personal details, set notification preferences, and upload a company logo if you operate on behalf of a business. Keeping your contact information up‑to‑date ensures smooth communication regarding order status, shipping updates, and promotional offers.
Uploading Designs and Preparing Files
Accepted File Formats
Laser247 supports a wide range of industry‑standard vector and raster formats, including DXF, AI, SVG, PDF, and high‑resolution PNG/JPEG for engraving. Ensure your design adheres to the platform’s guidelines: vector files should have clean paths without overlapping lines, while raster files must maintain a minimum resolution of 300 dpi for optimal engraving quality.
File Upload Workflow
To upload, navigate to “My Projects” and click “Add New Project.” Drag and drop your file or browse your local directories. Once uploaded, the system automatically generates a preview. Use the built‑in tools to check dimensions, orientation, and any required scaling. If the file contains multiple layers, assign each layer a specific laser setting (cut, engrave, score) using the layer manager. After confirming the preview, click “Save,” and your design will be ready for quoting.
Generating Quotes and Selecting Materials
Understanding Material Choices
Laser247 offers an extensive catalog of materials: acrylic, plywood, MDF, stainless steel, aluminum, carbon fiber, and specialized composites. Each material has distinct laser parameters, cost per square inch, and finishing options. Use the “Quotes & Pricing” section to select your desired material, input thickness, and specify any post‑processing requirements such as edge polishing or powder coating.
Real‑Time Cost Estimation
The platform’s algorithm calculates costs instantly, factoring in material price, cutting length, engraving area, and any additional services. Review the breakdown to ensure it aligns with your budget. If you need a bulk discount or have a large‑scale project, contact the sales team directly through the “Support” tab for a custom quotation.
Placing an Order
Step‑by‑Step Order Submission
Once satisfied with the quote, click “Proceed to Order.” Here you will confirm the following details:
- Project name and reference number.
- Delivery address—choose between standard shipping, express courier, or in‑store pickup if applicable.
- Payment method—credit/debit card, net banking, or corporate purchase order.
- Turnaround time—standard (3‑5 business days) or rush (1‑2 business days) with associated surcharge.
After reviewing all entries, click “Place Order.” You will receive an email confirmation containing the order ID, estimated completion date, and a link to track progress.
Payments and Invoicing
Secure Transaction Processing
All payments on the platform are processed through PCI‑DSS compliant gateways, ensuring encryption of sensitive data. For corporate clients, Laser247 supports GST‑compliant invoicing; simply provide your GSTIN during checkout to receive a tax‑exempt invoice. Payments can be made in full or via a 30‑day credit line if approved.
Managing Billing Preferences
Within the “Billing & Payments” section, you can store multiple payment methods, set a default, and view past invoices in PDF format. If you encounter any discrepancies, open a support ticket directly from the invoice view for swift resolution.
Tracking Order Progress
Live Order Dashboard
Laser247’s order tracking panel updates in real time, showing stages such as “Design Review,” “Material Cutting,” “Quality Inspection,” and “Ready for Shipment.” You can subscribe to email or SMS notifications at each milestone. For high‑value orders, a dedicated account manager may provide personalized updates.
Handling Revisions and Corrections
If the completed part does not meet your specifications, initiate a “Revision Request” through the order page within 7 days of delivery. Upload annotated screenshots or revised design files, and the production team will assess feasibility. Minor adjustments are often accommodated at no extra cost, while major changes may incur additional fees.
Support and Troubleshooting
Accessing Help Resources
The “Support” hub houses a comprehensive knowledge base, covering topics from file preparation to post‑processing techniques. For urgent matters, the live chat button, available during business hours, connects you with a technical specialist. Alternatively, submit a ticket outlining your issue and attach relevant screenshots; response times typically fall within 24 hours.
Common Issues and Resolutions
Below are frequent challenges new users encounter and quick fixes:
- File upload errors: Ensure the file size is under 50 MB and uses a supported format.
- Incorrect dimensions: Verify the design’s scale before uploading; use the preview tool to confirm measurements.
- Payment failures: Check that your card is authorized for international transactions and that the billing address matches the card’s registration.
- Login problems: Clear browser cache or try a different browser; reset your password if you suspect it’s compromised.
Best Practices for Ongoing Success
Maintain a Design Library
Organize your frequently used design files into folders within “My Projects.” Tag each file with material and thickness metadata to streamline future quoting. Consistent naming conventions reduce confusion when collaborating with team members.
Leverage Promotions and Bulk Discounts
Laser247 periodically offers promotional codes for new material lines or seasonal discounts. Subscribe to the newsletter via your profile settings to stay informed. For large production runs, request a volume discount through the sales contact; the platform often offers tiered pricing based on square footage.
Conclusion
Embarking on your journey with Laser247 becomes a seamless experience once you master the fundamentals of account creation, secure login, and dashboard navigation. By following the structured steps outlined in this guide—signing up via the laser247 online portal, verifying your credentials, uploading precise design files, and utilizing the robust quoting and support tools—you can harness the full potential of on‑demand laser manufacturing. Whether you are prototyping a new product or scaling up production, Laser247 equips you with the technology and expertise needed to turn digital concepts into tangible results efficiently and cost‑effectively.